
Direct Preview lets you test and iterate on complex interactions directly inside the Unity Editor Play Mode using live data from the Android XR Device. With Direct Preview, the host machine renders and debugs the content, streams the visual viewport directly to your physical Android XR device, and streams supported OpenXR extensions back to the host in real time.
Follow this guide to set up Direct Preview for your project in Unity.
Prerequisites
Before beginning, ensure your development environment meets the following requirements:
- Unity version: Unity 6 version 6000.3.5f2 or higher.
- Project setup: Complete all steps in the Unity project setup guide.
- Unity packages: Complete all steps in the Android XR Extensions for Unity quickstart guide. When importing packages, use version 1.2.0 or higher of the Android XR Extensions for Unity. This is provided as a tar file in each release.
- Android XR Engine Hub: Complete all the steps in the get started section of the Android XR Engine Hub guide to install and configure your host machine for Direct Preview.
Hardware:
- Use a host machine running Windows 11.
- Use a modern graphics card with Vulkan Video Encoding support.
Review known issues and limitations
Review the following known issues and limitations so you know what to expect as you use Direct Preview in Unity:
- Audio: Audio doesn't stream to the headset. Instead, it plays through the speakers or headphones on your host machine.
- Resolution: Controls for altering resolution are limited. The system
requests
{2364, 2880}per eye. - UI/UX: The client connection flow is functional but unpolished for this early release.
- Extension Support: While many extensions are supported (such as Hand Tracking, Eye Gaze, and Face Tracking), this is a limited set compared to native builds.
Configure graphics settings
Set Vulkan as the default renderer on Windows that handles video stream encoding:
- Navigate to Edit > Project Settings > Player.
- Click the Other Settings tab.
- Deselect Auto Graphics API for Windows.
- If Direct3D11 or Direct3D12 are listed, select each one and click minus (-).
Add Vulkan: Click plus (+) and select Vulkan.

Restart the Unity Editor to apply these changes.
Configure OpenXR plugin management settings
Configure your OpenXR plugins for streaming:
- Navigate to Edit > Project Settings > XR Plug-in Management.
- Click the Windows / Standalone tab (this tab has a computer icon).
- In the Plug-in Providers section, select OpenXR.
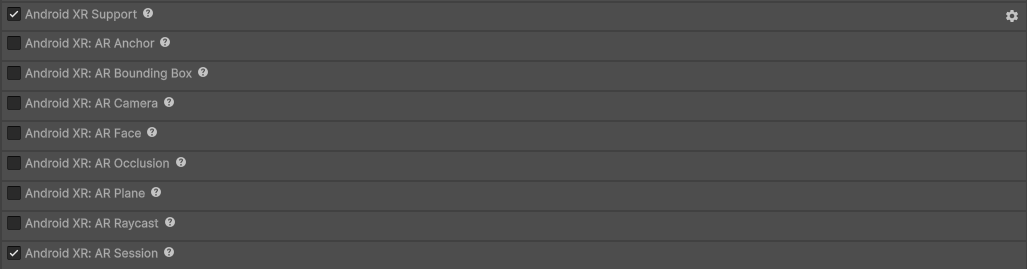
- In the OpenXR Feature Group section, select Android XR (Extensions).
Select both Android XR Support and Android XR: AR Sessions.
This enables all supported features and dependencies for streaming.
Restart the Unity Editor to apply these changes.
Configure graphics and quality settings
Configure the following settings to ensure stream compatibility:
- Navigate to Edit > Project Settings > XR Plugin Management > OpenXR.
For each of the following settings, select the following options:
- Render Mode: Multi-pass
- Depth Submission: Depth 24 bit
- Foveated Rendering API: Legacy

Perform project validation
Perform project validation to fix any OpenXR errors in your project's configuration:
- Navigate to Edit > Project Settings > XR Plug-in Management > Project Validation.
- Click the Standalone tab.
- Click Fix All for any errors with the
[OpenXR]prefix. Click Fix All for any errors with the
[Android XR Streaming]prefix.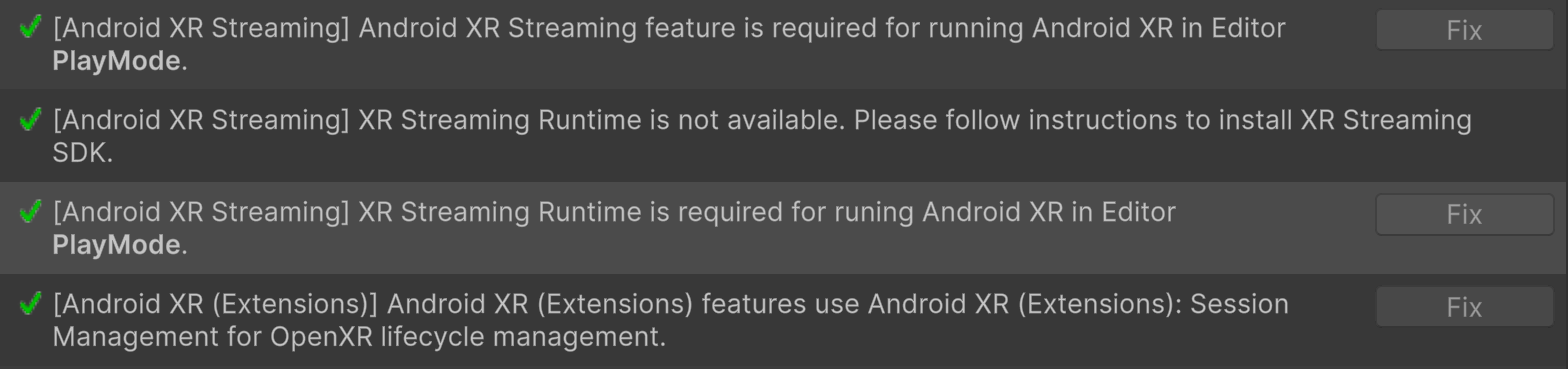
Start Direct Preview
Start Direct Preview to stream directly from Unity:
Connect your Android XR device to your host machine using a high-quality USB-C cable.
If you've never used this device with Direct Preview before, connect and configure the device for Direct Preview in the Android XR Engine Hub before you start Direct Preview through your game engine.
In the Unity Editor, click Play.
The device stream automatically starts.